April 25, 2025 Recipe of the Week
Wild ramps are carpeting our forest floor. Ramp season is fleeting and we love to use them as much as we can while they last. Our favourite way to eat them? With potatoes! And what goes better with potatoes than pork chops and salad (a.k.a. this week’s recipe box)?
This week’s recipe took some experimenting for me. True confession: I have never pan fried or grilled a pork chop before.
Before we started raising pastured pork, we didn’t eat pork chops. We didn’t like the flavour and we didn’t like the way factory farmed meat was raised.
Since we have started raising livestock, although I do most of the cooking in our house, any time there are pork chops on the menu, one of the men of the house has it seasoned and grilled before I even come up with a plan for it.
In preparation for this week’s recipe, I thought that I should do all of the cooking myself so that I would know what I was talking about. I have to admit, it took a few trial runs! In the end, I have a good technique under my belt and can hopefully help you to master it in your first try!
| Pantry items: Extra Virgin Olive Oil Balsamic vinegar Dijon Butter Salt and pepper |
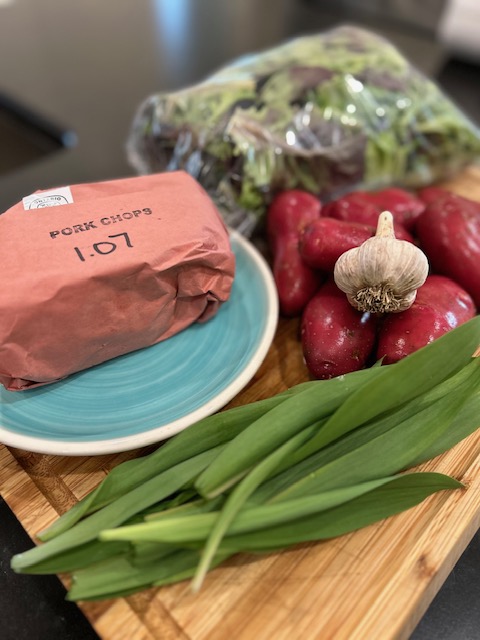
Included in your basket:
One package of pork chops
1 lb potatoes
One bunch of ramps (use half for a single batch)
One bag of mixed greens (use 1/2 for a large salad for two people)
One head of garlic (you need 1 small clove for the salad dressing and a 1-2 cloves if you are pan frying the chops)
| Equipment: Knife and Cutting Board Bowl and whisk Cast iron pan and tongs Instapot (or a plain old pot, you will just need to monitor the cooking yourself vs walking away and ignoring it) Instant read meat thermometer |
Method
Thaw your pork chops in the fridge a day or two before you plan to make this.
Start by preparing your meat. Dry the surface with paper towel or a clean kitchen towel and sprinkle both sides with kosher salt.
This is the step that I struggled with. I had no idea just how much salt to add. The first time I tried, I under-salted the meat. It was still delicious but not as good as when the guys make it.
The second time, Greg salted the meat and I just took photos. The result? tender and juicy perfection:). How much salt did he add? Quite a bit. Like sprinkles on a sugar cookie. Enough that you can clearly see a layer of salt on both sides of the meat.

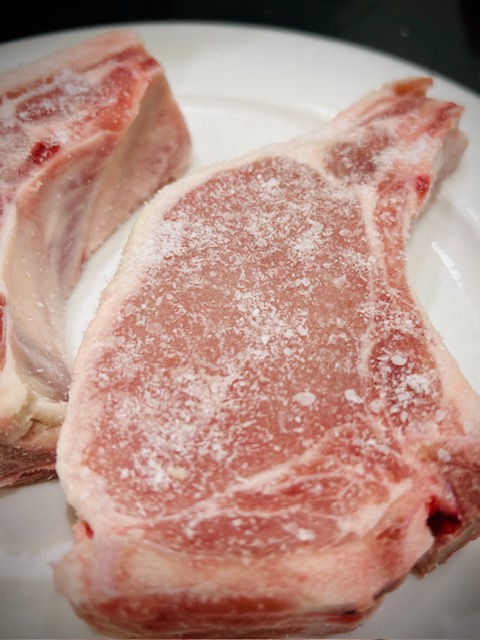
Once the meat is salted, let it sit (on top of a rack) for at least 45 minutes. This allows time for the juices of the meat to be drawn out, dissolve the salt and then pull the salt and liquid back into the muscle where it tenderizes the proteins so that they don’t contract when they are heated. This way, the meat stays tender and all of the juices stay inside of the chop rather than pooling in your pan around a tough but delicious piece of meat.
Set a timer for 45 minutes. The rest of the prep is pretty straightforward so there will likely be time for a cup of tea after prep and before cooking the meat.
While the meat is doing it’s thing, everything else can be prepped.
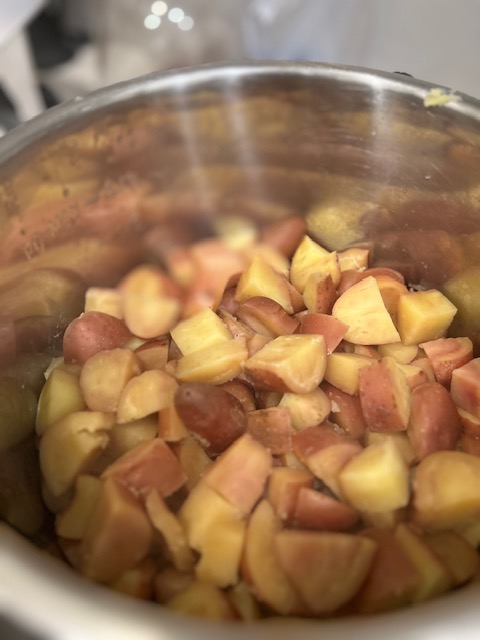
Wash and chop the potatoes and put them in an instapot with 1/2 inch of well salted water in the bottom. Set the pot for 5 minutes on high pressure and walk away:).

Next, prep the salad dressing (see the previous post on versatile vinaigrette) and salad greens. The greens are washed but should be torn up a bit so that they are bite sized. Have some other delicious fruit/veggies/quail eggs/croutons etc? Chop them up and throw them in! Keep the dressing and greens separate until serving time so that they stay fresh.
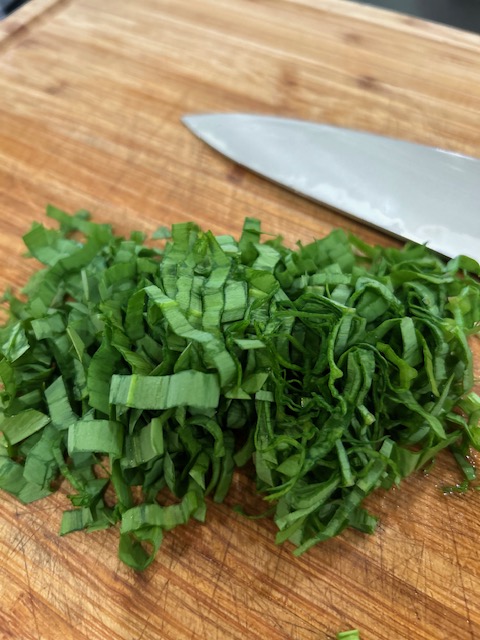
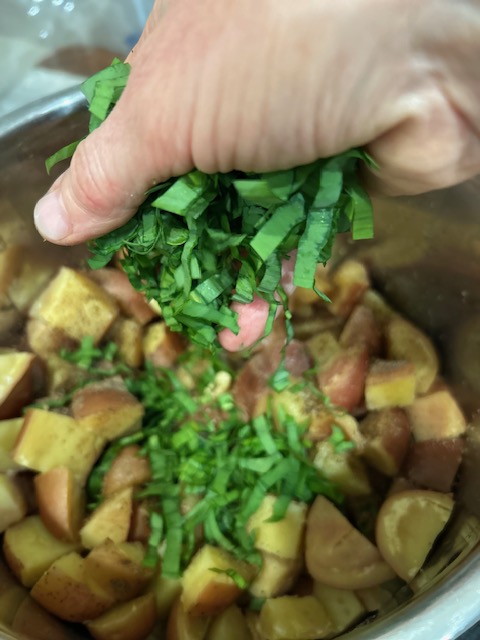
While you are chopping, finely chop the ramps so that they are ready for the potatoes and peel a few garlic cloves for the pork chop pan.
Once your timer goes off, you can start to heat your pan (or BBQ if that is your preference!). Still enjoying your tea? No worries, everything can wait at this point. The meat will only get better the longer it sits. If you plan to dry brine it for more than an hour, place it in the fridge, uncovered, for up to a day.
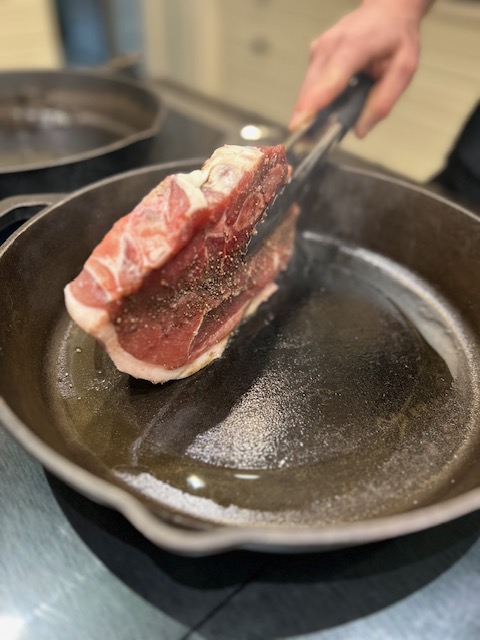
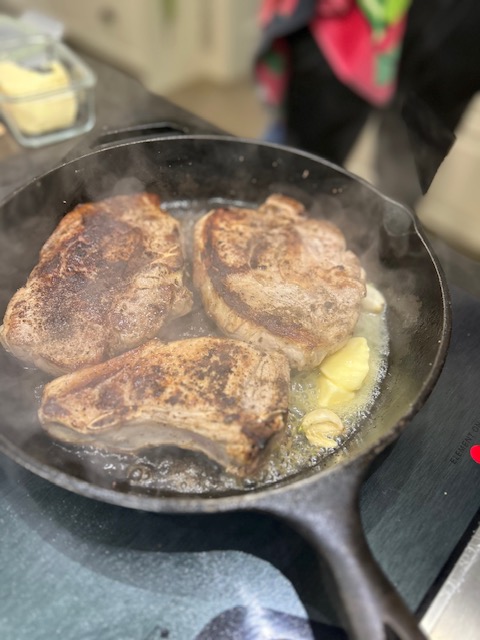
Heat some extra virgin olive oil in a pan on medium-high heat. Make sure the meat is dry on both sides (otherwise it will steam and not brown) then add pepper to both sides of the chops. Once the pan is smoking, start cooking!
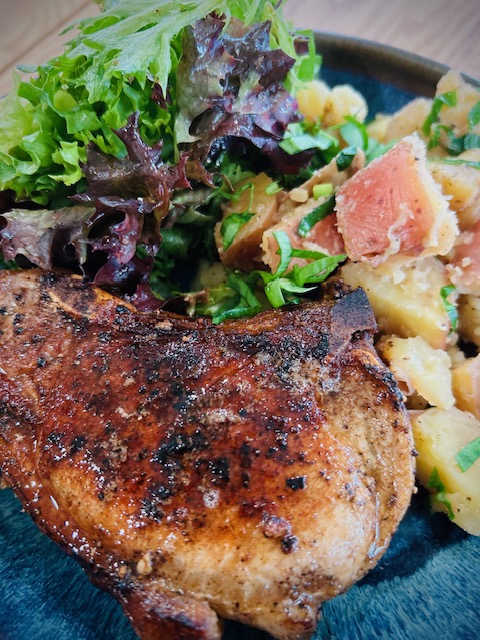
Start by browning the fat cap on the chops by holding the chops on end with some tongs. Once this is nicely browned, begin cooking the sides, turning every minute or so until they are nicely browned on both sides and the internal temp is 110-120 degrees (or they are partially cooked through when you cut them open to peek). Then add a dollop of butter and the peeled garlic cloves to the pan and baste the chops as you continue to turn them for the last few minutes until they are almost cooked through (internal temp 145 degrees). Remove them from the pan and let them rest while you put the finishing touches on everything else. They will continue to cook a bit more while they rest.

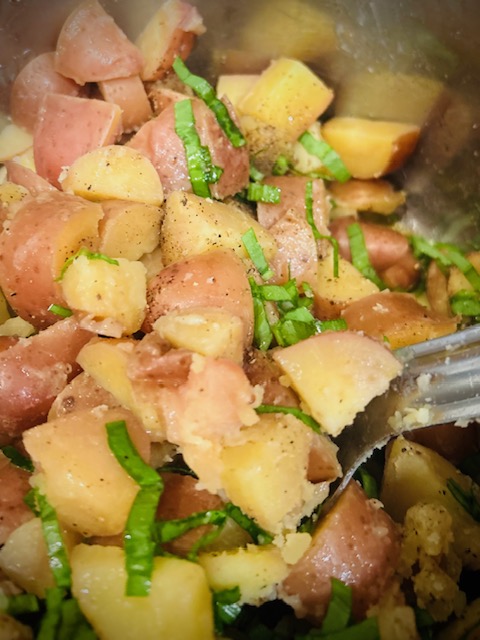
Vent the steam from the instapot, strain the potatoes and let them steam for a minute to remove excess water. Then add butter, salt and pepper to taste and finish by adding the chopped ramps. You won’t believe how amazing they will smell!
Toss the salad and dressing together and dinner is ready!
Time Savers, Storage Tips and Spin off Recipes
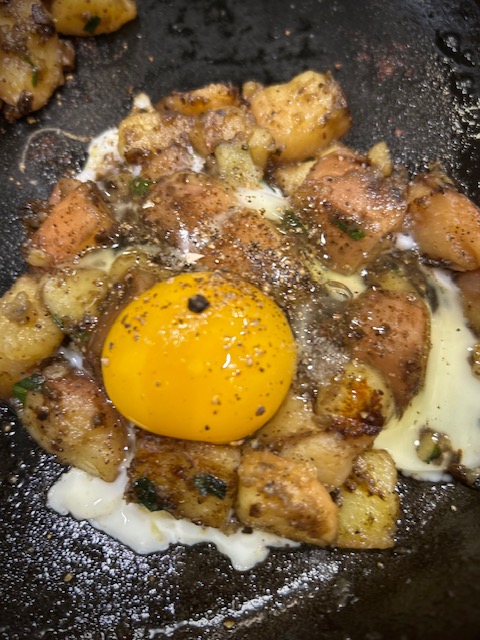
- If you are like us, with this meal there will be no leftovers. I always make a double batch of ramp potatoes just so that I will have leftovers for leftover potato hash.
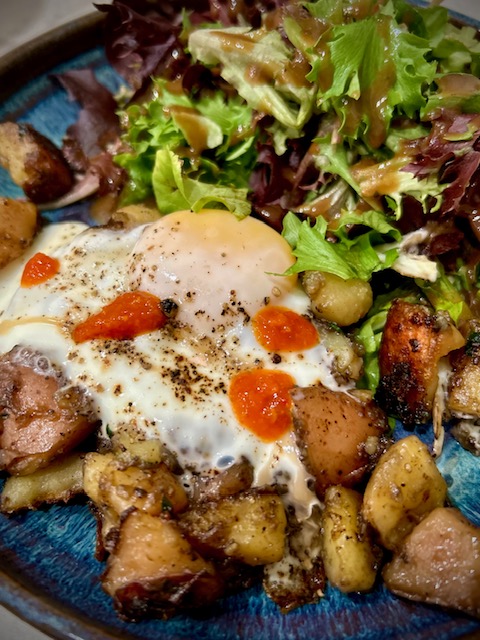
- Heat some extra virgin olive oil in a cast iron pan on medium-high heat. Add a good sized scoop of leftover ramp potatoes for each person. Pan fry them until they are starting to become golden brown. Then shape them into little patty shapes and crack an egg on top of each patty. Season with salt and pepper. Turn the heat to medium-low, cover and allow the egg to steam until it is opaque on top and the white part is cooked through. By this point, the potato will be crispy on the bottom and held together with bits of egg. Put one patty on each plate and serve with hot sauce and a salad!
Did you Know?
Wild foods often contain higher levels of vitamins, minerals, antioxidants and phytochemicals. They grow in diverse environments which allow them to access to more nutrients and minerals. They also need to fend for themselves thus have to build strong defences (phytochemicals). They have not been bred for specific traits (like yield) which can negatively impact nutrient profiles.
| This Recipe’s Plant Count: Nine plus any extra veg you added in to your salad |
| Time Required: ~1 hour, including time for a cup on tea:) |
| Number of Servings: One recipe box will feed two hungry people, make 2 for a family of four. |
