One of our most popular items at the market and on the online store is our Harmony Farm Pizza.
We started making pizzas as a way to showcase some of our seasonal foods that folks may not be as familiar with. They really are a great blank canvas for so many different flavour combinations.
When dreaming up new ideas for pizza toppings, I think of four basic elements: the base, the main event, the cheese and the garnishes.
For the base, think of things that spread easily and will add a bit of flavour to complement the main ingredient. I often use extra virgin olive oil, pesto, béchamel sauce or freshly sauced tomatoes.
Fresh herbs and edible flowers make great garnishes. Depending on the main event, I may also add a drizzle of honey, olive oil, balsamic or creme fraiche.
For cheese, I almost always use Upper Canada Creamery cheese curds. They are local, organic, delicious and perfect for pizzas. I often add parmesan and sometimes add something else like homemade ricotta or kefir soft or hard cheese.
For the main ingredient, almost anything goes. Generally speaking, things that grow together go together. And it is hard to go wrong with slow roasting just about any veg in extra virgin olive oil, salt and pepper! The most important thing to do is to prep the ingredients in advance and allow them to cool before putting them on the pizza (or make extra for dinner the night before and save the extras for pizza!). If ingredients are still hot, they may cause holes to form in the delicate dough.
But first of all, you need the dough. I have tried many different doughs, flours and techniques. After many trials, this recipe is our family favourite.
The recipe is simple. As with the toppings, the key is with using fresh and local ingredients, paired with a tried and true technique.
Ingredients for enough dough for 19-20 personal pizzas:
- 52 g sea salt
- 1400 g 95 degree water
- 2000 g organic 00 pizza flour
- 1/2 tbsp instant yeast
- Semolina for dusting
Equipment:
- Large covered bowl or container (eg 12L cambro with lid)
- Food scale
- Instant-read Thermometer
- Containers for cold fermenting dough (eg large tupperware/hotel pan for all dough together or 500 ml deli containers to store separately)
- Bench scraper/plastic paint scraper/spatula to remove dough from storage container
Method:
- Start by weighing the salt in your large bowl/container
- Tare your scale and add 1400g water (95 degrees)
- Make sure all the salt is dissolved then sprinkle 1/2 tbsp yeast on top and allow this to dissolve while you measure the flour
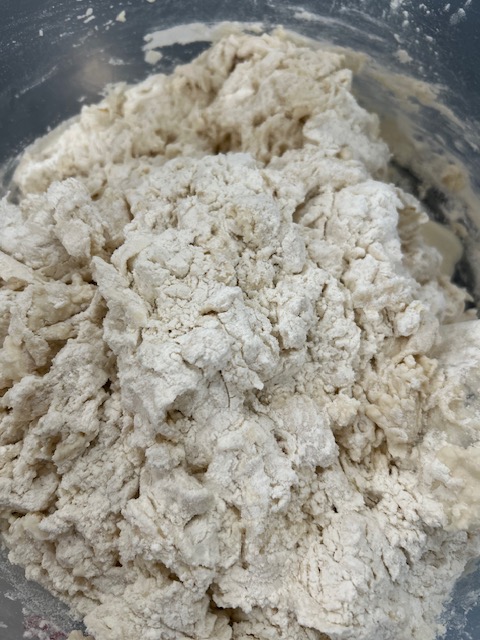
- Weigh 2kg 00 flour in a separate bowl
- Stir the yeast to distribute throughout the salted water then add the 2kg flour to the bowl
- Mix with a spatula/dough scraper/spoon until just combined then thoroughly mix by hand until there are no clumps of flour left
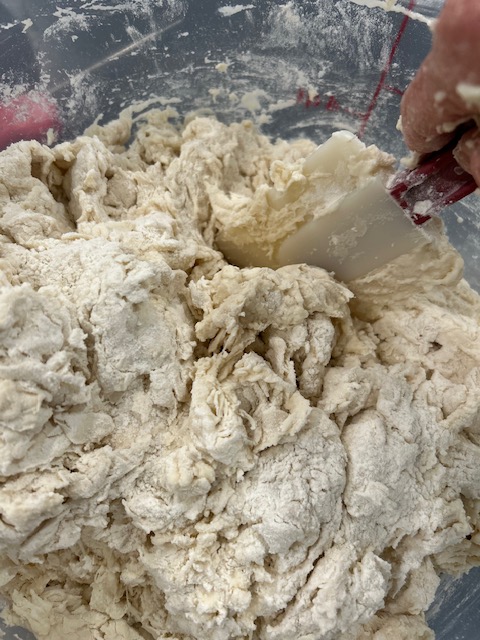
- Mix by hand by alternating between folding (start with your hand under the dough, pull the dough up and over the top of the dough ball then rotate and repeat ~4 times) and pinching (squeeze the dough between thumb and index finger, cutting through the full thickness, about 4 times along the length of the dough). It should take 1-2 minutes to fully incorporate the wet and dry ingredients.
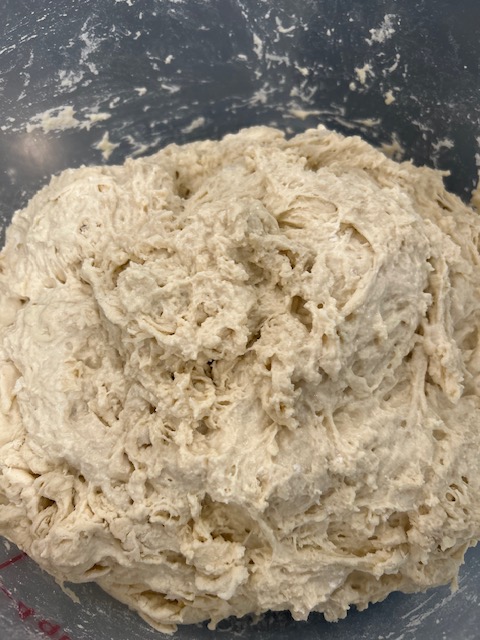
- The dough will be rough and sticky when you are done.

- Once the ingredients are fully mixed, cover the container and set aside for 20-30 minutes to rest.
- Prepare a bowl of warm water for your hands. Spread a very thin film of water on your counter top to prevent sticking. Lightly moisten your hands to also keep them from sticking to the dough.
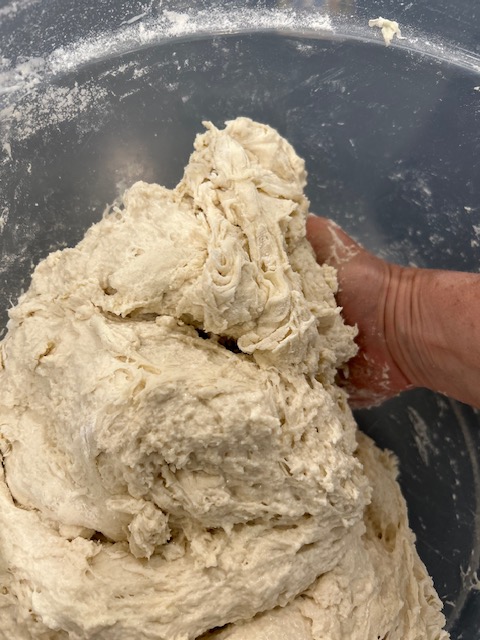
- Turn the dough out onto the moistened counter top.
- Work your hands under neath the dough and do a series of 7-8 “slap and folds” until the dough is smooth and elastic.
- To slap and fold, after working your hands under the dough, lift the dough and flip the entire dough ball upside down, hitting the counter with a “slap” then pull ~1/2 of the dough (the portion closest to you) up and over the other half. Rotate and repeat until the dough is gorgeously smooth. If it is starting to feel a bit sticky, give your hands a quick dip and shake to keep them from sticking and carry on.
Check out Harmony Farm’s Facebook page to see how this looks!
- Place the dough back in the covered container and keep at room temp for ~2 hours or until it has doubled or tripled in size. Then you are ready to shape the dough.
- To shape, cut off ~175-180g at a time then fold and roll into a tight little ball to hold in all of the gases that will form during cold fermentation.
- To fold and roll, start by holding the dough down in the middle then take one side and pull it out (to stretch out the gluten strands) then fold it back over itself. Rotate and repeat this for a total of 3-4 times until you have a rough ball.
- Then pull the ball toward yourself by cupping your hands together and pulling the ball along the counter with your two pinkie fingers. Rotate and repeat this for a total of 3-4 times until you have a shiny, smooth ball.
Check out Harmony Farm’s Facebook page to see how this looks!
- Place each ball in a deli container or all together in a large storage container.
- Refrigerate the dough balls for 24-48 hours or freeze them for later use.
- If frozen, place the dough in the refrigerator 24 hours before using to allow it to thaw and cold ferment then use as below.
- ~An hour before pizza time, bring the dough out of the fridge and allow to warm to room temperature.
- Sprinkle a bit of flour on the counter where you will place your dough ball and a bit of semolina on the counter where you will place the dough once it is stretched and ready to be dressed. Keep some extra of both near by for top ups.
- This is a good time to set up your pizza station. The dough is delicate. You need to get it in the oven right after it has been dressed or the moisture in the toppings will cause it to tear. Setting up a station allows you to dress it as soon as you have it stretched so you can get it right in the oven.
- Gently remove each dough ball using a spatula/dough scraper/paint scraper, trying to make sure you do not deflate all of the gases that have built up during the cold ferment (that is what gives it its flavour!)
- Sprinkle it generously with flour to keep it from sticking then punch it down in the middle on one side, flip it and punch in a circle from the middle out, avoiding the outer couple of centimeters that will become the rim of the pizza. Flip and repeat on the other side.
- Pick up the dough and pull and stretch all the way around, protecting the outer rim, moving around like you are holding a steering wheel.
- Then make two loose fists and gently move the dough over the backs of both fists and stretch again by pulling back and stretching your fingers slightly. Keep turning and stretching until you have a nice circle (~9″ diameter) then rest the dough on your sprinkling of semolina and dress it up!
- Check out Harmony Farm’s Facebook page to see how this looks!
- As tempting as it may be, remember that less is more. This dough cannot support a lot of toppings or too much moisture. Just use small amounts of delicious ingredients:).
- Once you have dressed your pie, gently lift underneath the rim with two or three fingers (the goal is to preserve the rim you have worked so hard to create), slide the peel between the semolina and the dough and then, again with two or three fingers, lift and re-shape anywhere that got a little mis-shapen during the process.
Check out Harmony Farm’s Facebook page to see how this looks!
